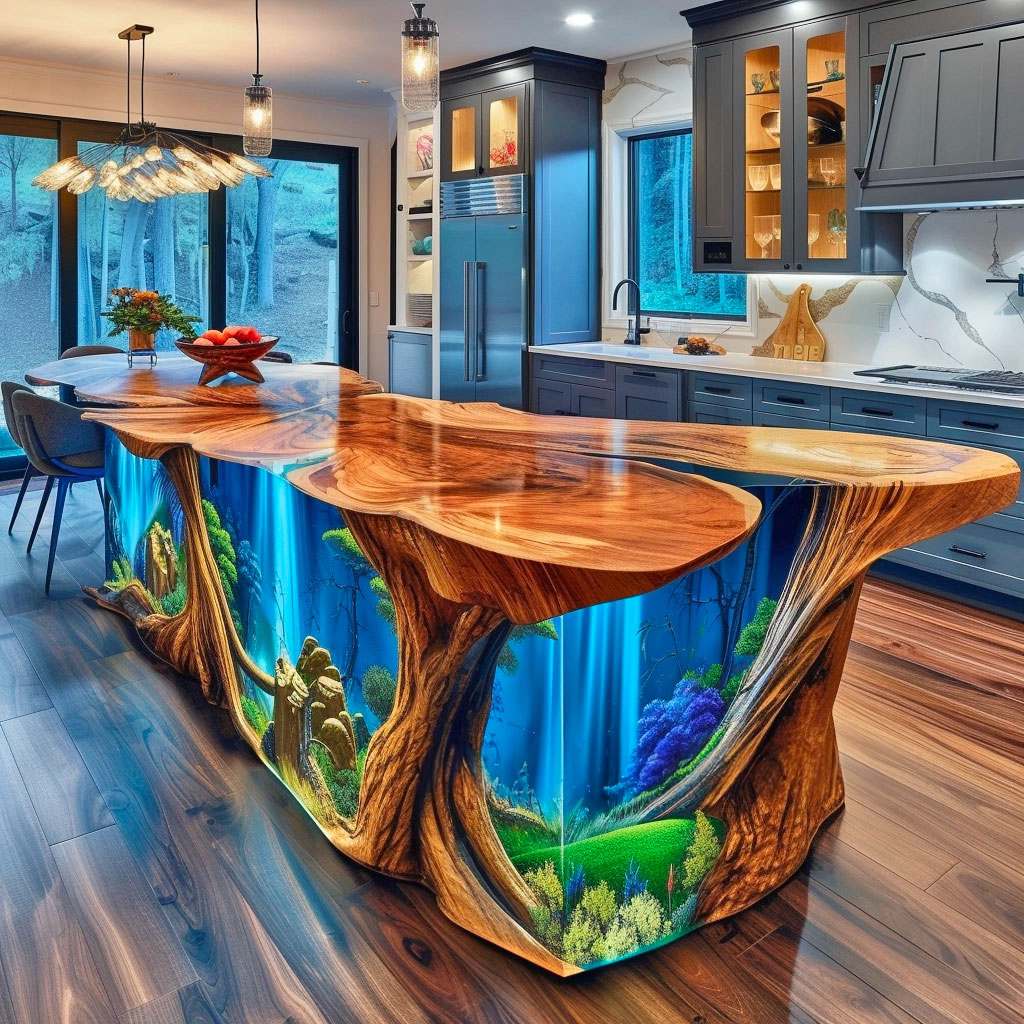
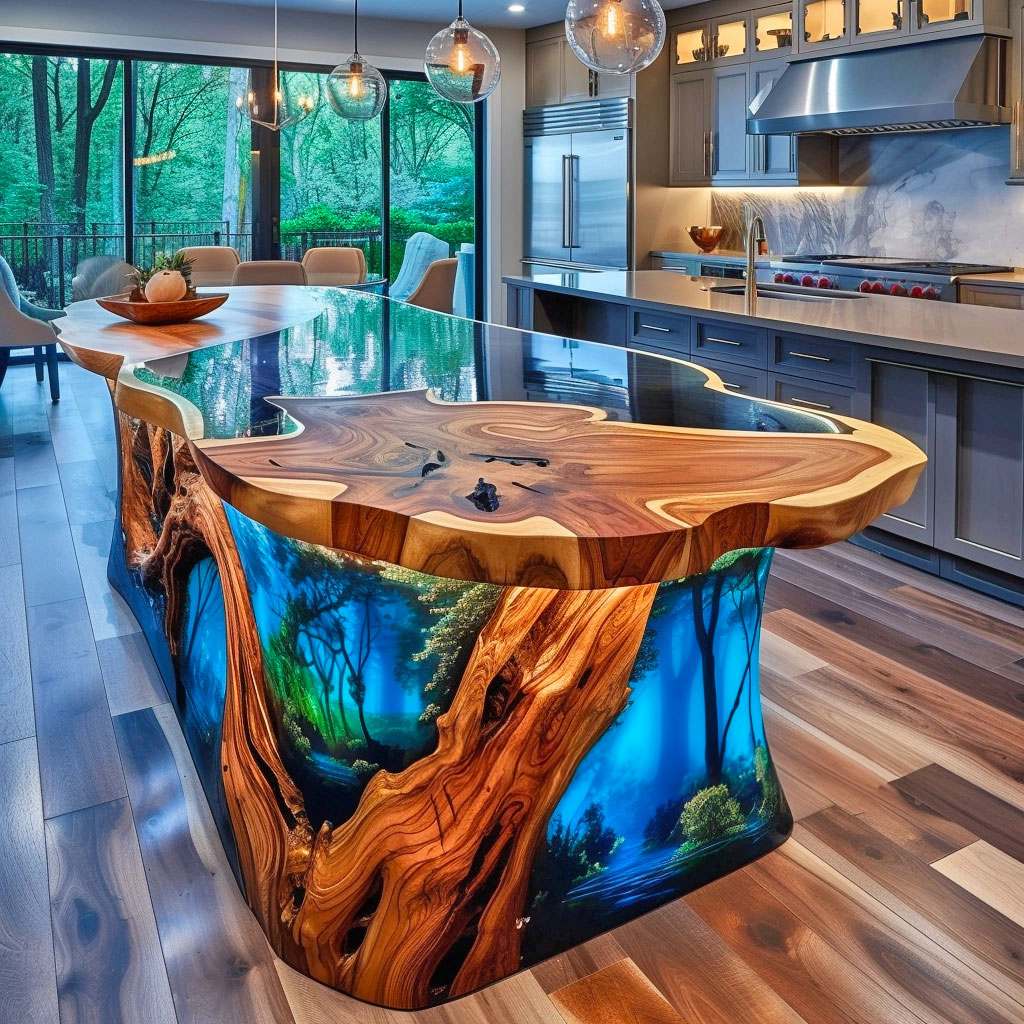
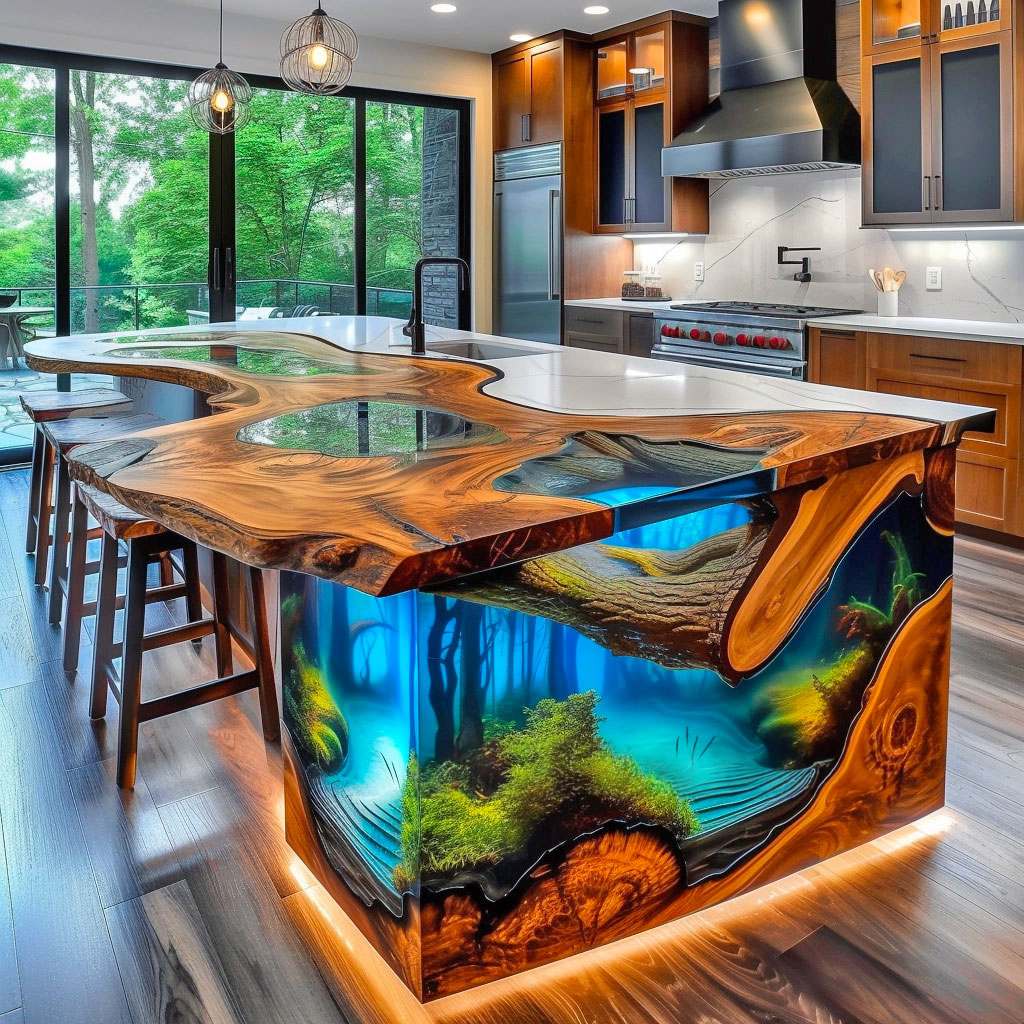
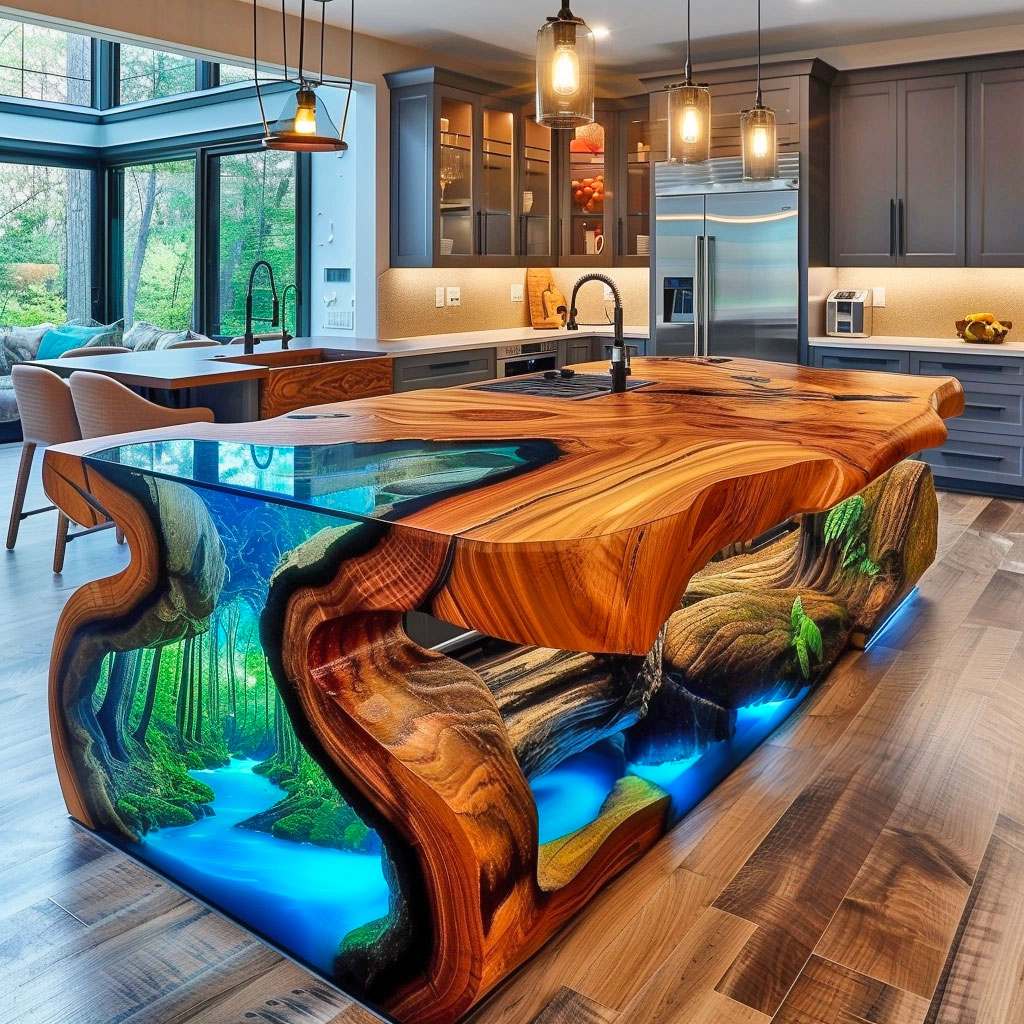
Elevate your kitchen with the perfect blend of natural beauty and modern style by incorporating Wood and Epoxy Kitchen islands 🌳✨. These stunning pieces seamlessly marry rustic charm with contemporary flair, creating a focal point that stands out in any home. The contrast between the warmth of wood and the sleekness of epoxy resin results in a unique design that exudes character and sophistication. Upgrade your culinary space with a touch of elegance while enjoying the durability and versatility these kitchen islands offer.
Contents
- 1 Benefits of Epoxy in Kitchen Island Design
- 2 Unique Kitchen Island Ideas with Wood and Epoxy
- 3 Design Planning for Wood and Epoxy Kitchen Islands
- 4 Essential Materials and Tools for Wood and Epoxy Islands
- 5 Step-by-Step Guide to Creating Wood and Epoxy Kitchen Islands
- 6 Artwork Creation Using Epoxy for Kitchen Islands
- 7 Sanding and Finishing Techniques for Epoxy Kitchen Islands
- 8 Safety Measures When Working with Epoxy
Benefits of Epoxy in Kitchen Island Design
Durability and Longevity
Wood and epoxy kitchen islands are favored for their durability. Epoxy creates a tough surface that withstands daily wear and tear, ensuring your kitchen island lasts for years without damage. The epoxy coating acts as a protective layer over the wood, making it resistant to scratches, stains, and heat.
Epoxy’s resilience makes it perfect for high-traffic areas like kitchens where spills, cooking activities, and frequent use are common. Unlike other materials that may show signs of wear over time, wood and epoxy kitchen islands maintain their pristine appearance with minimal maintenance. This durability ensures that your investment in a kitchen island pays off in the long run.
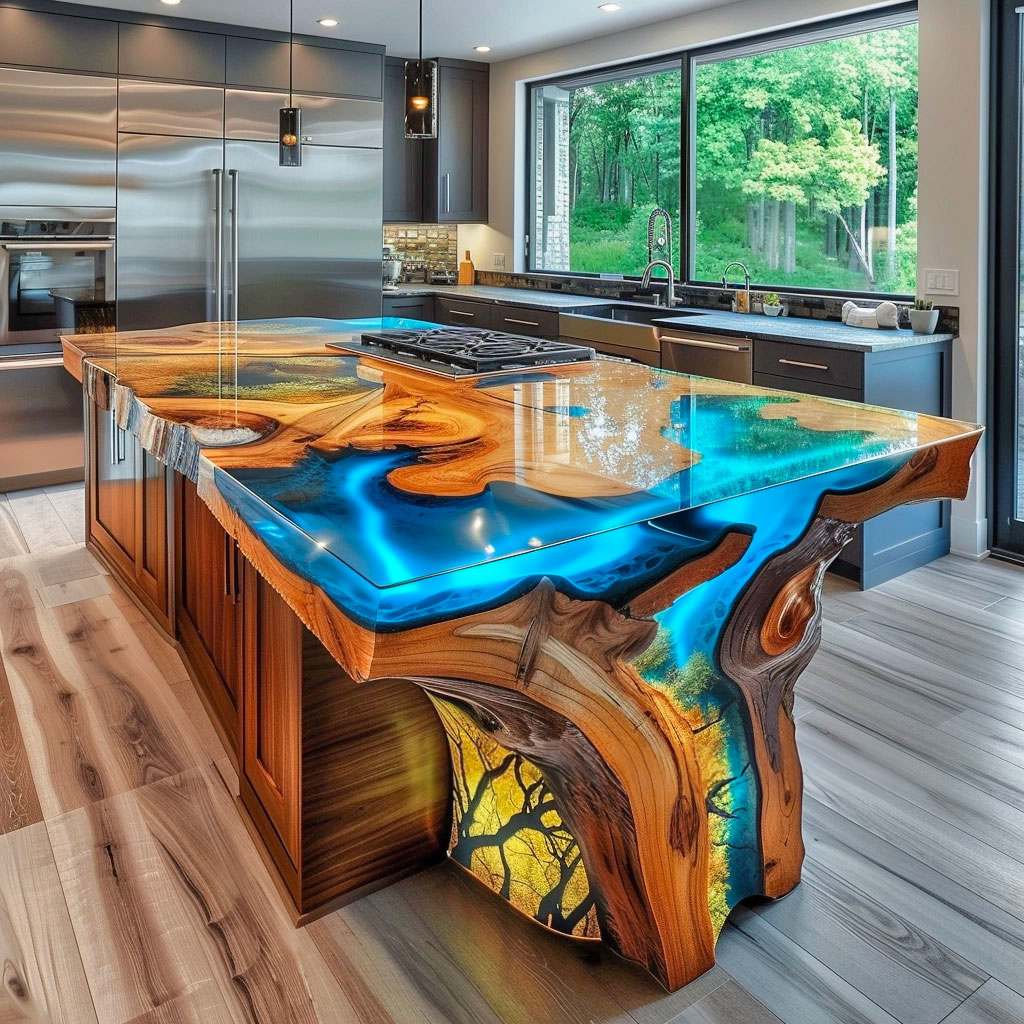
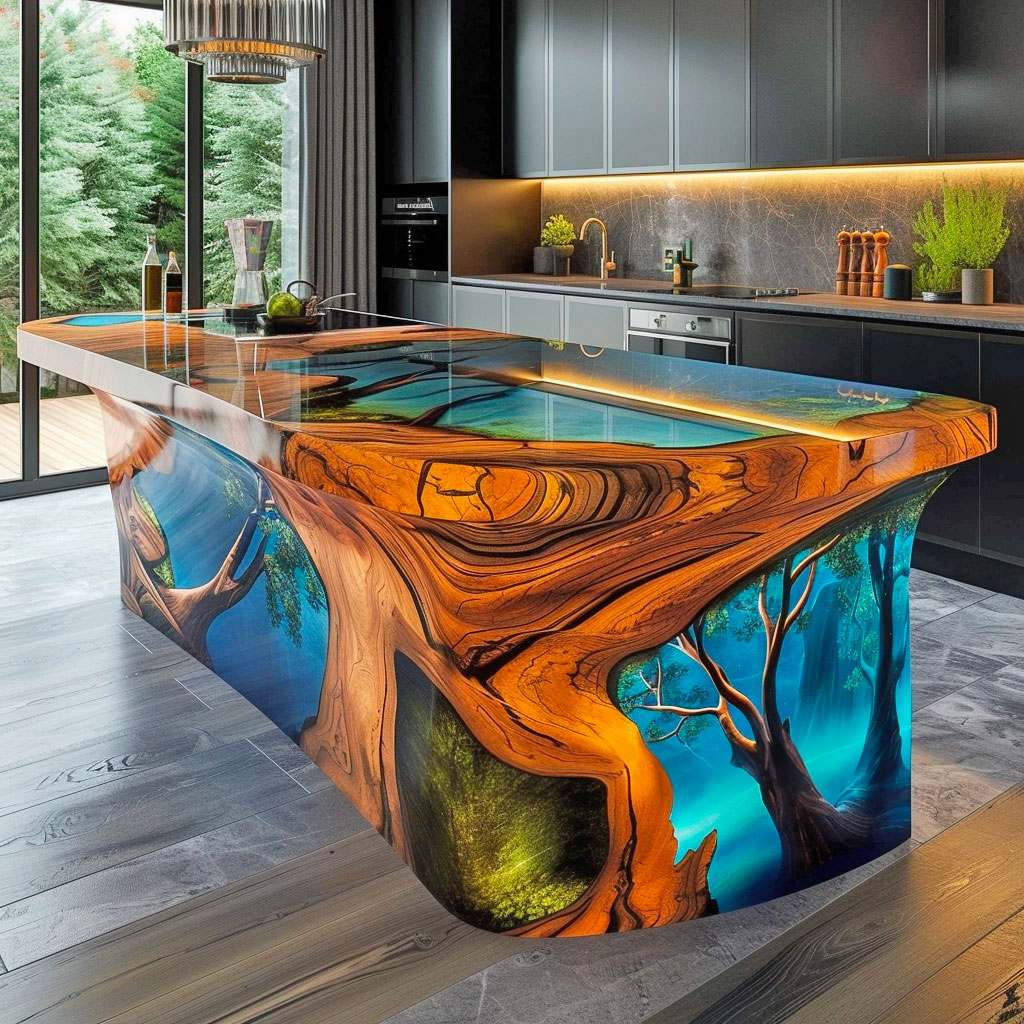
Modern Aesthetic Appeal
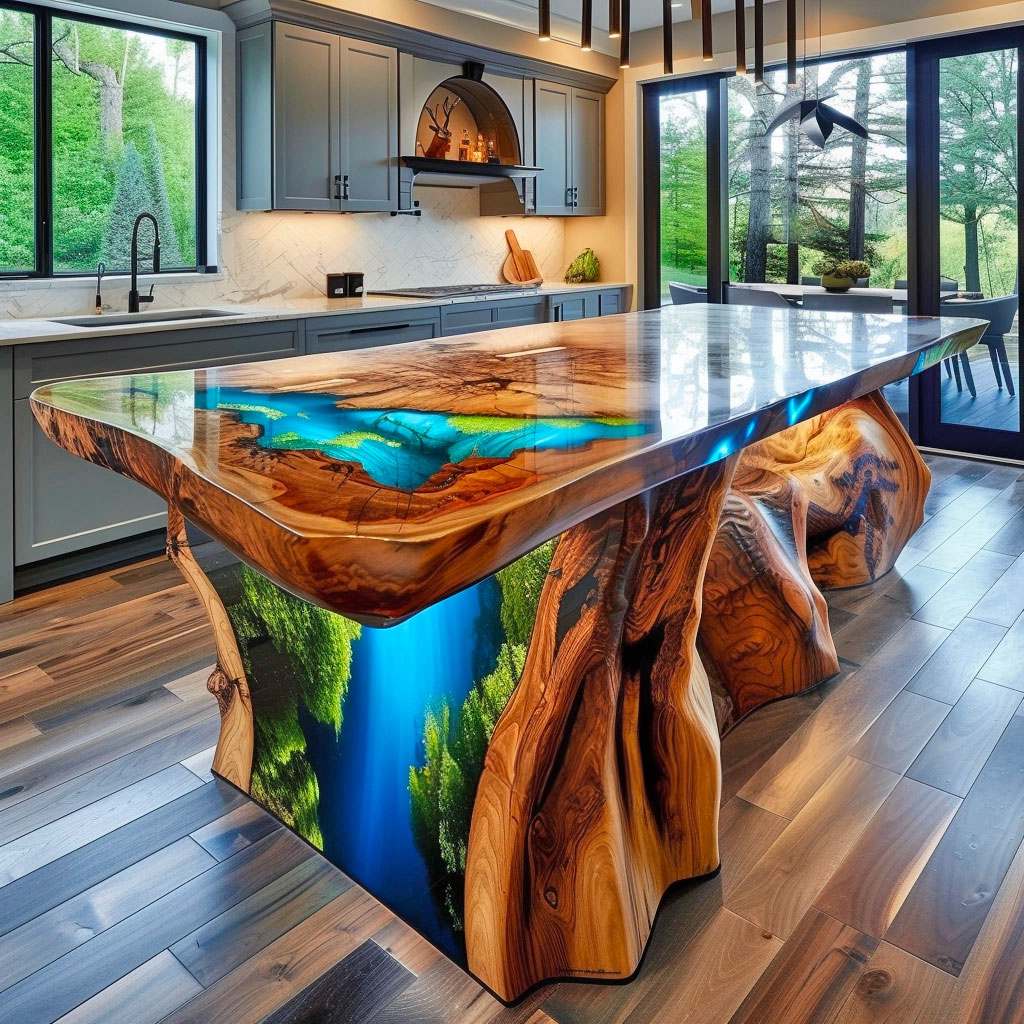
In addition to its practical benefits, epoxy adds a touch of modern elegance to wooden kitchen islands. The glossy finish of epoxy enhances the natural beauty of the wood grain while providing a sleek look that complements various interior styles. Whether you prefer a contemporary or rustic design, combining wood with epoxy allows you to achieve a customized aesthetic for your kitchen island.
- Pros:
- Durable surface resistant to scratches and stains.
- Modern glossy finish enhances visual appeal.


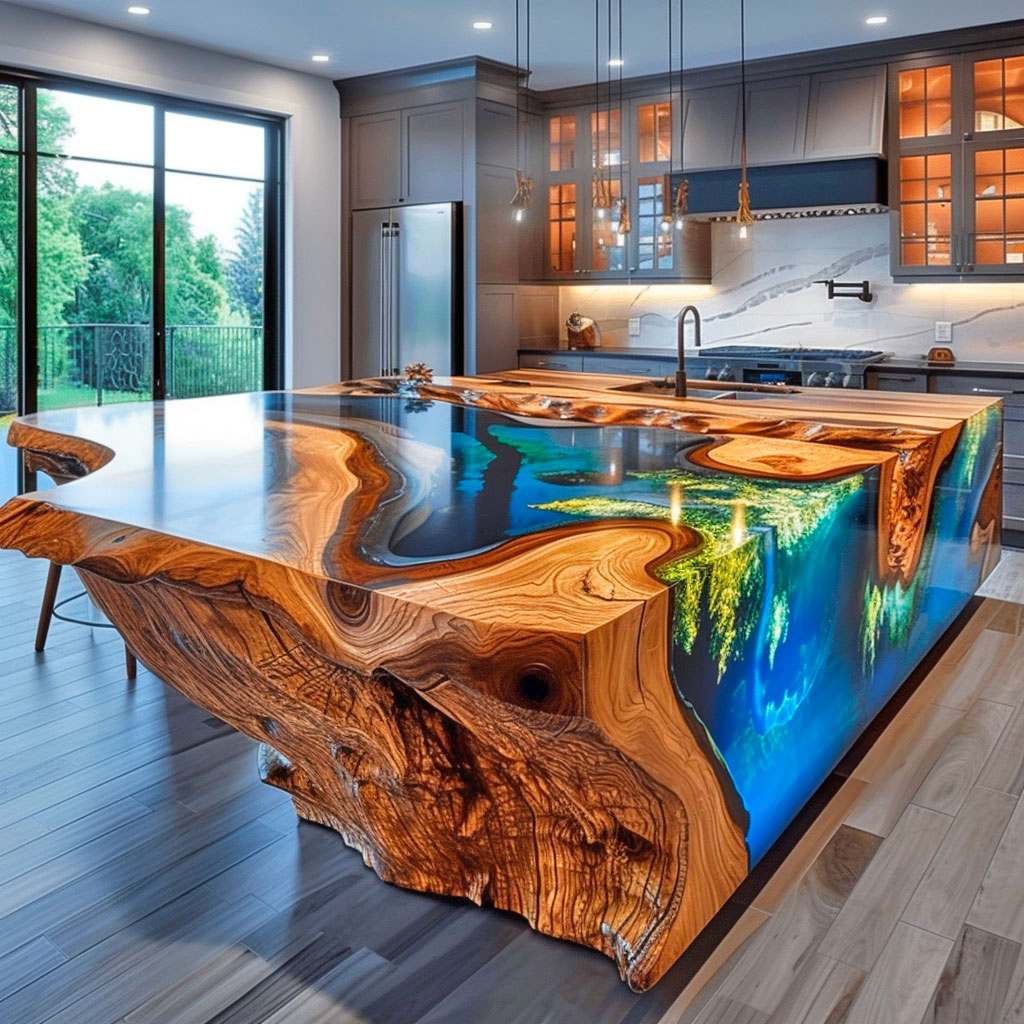
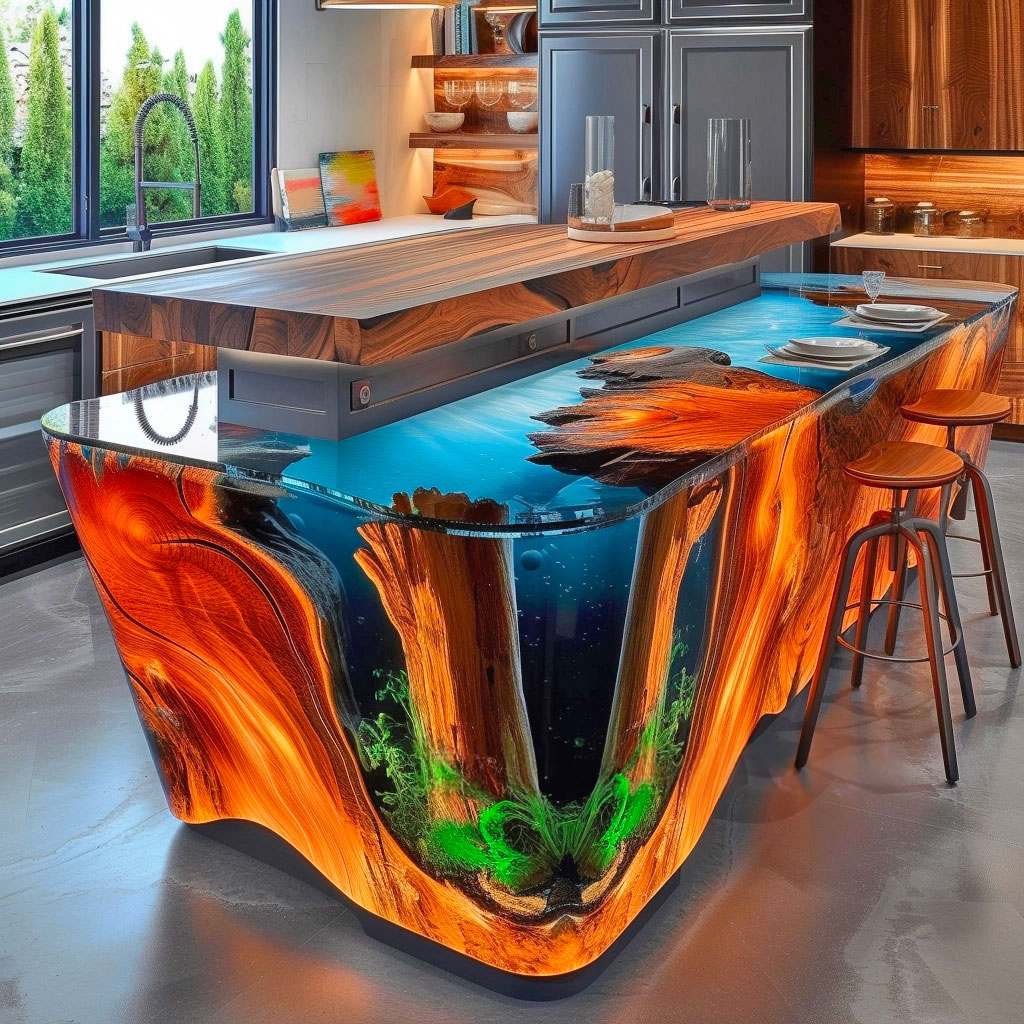
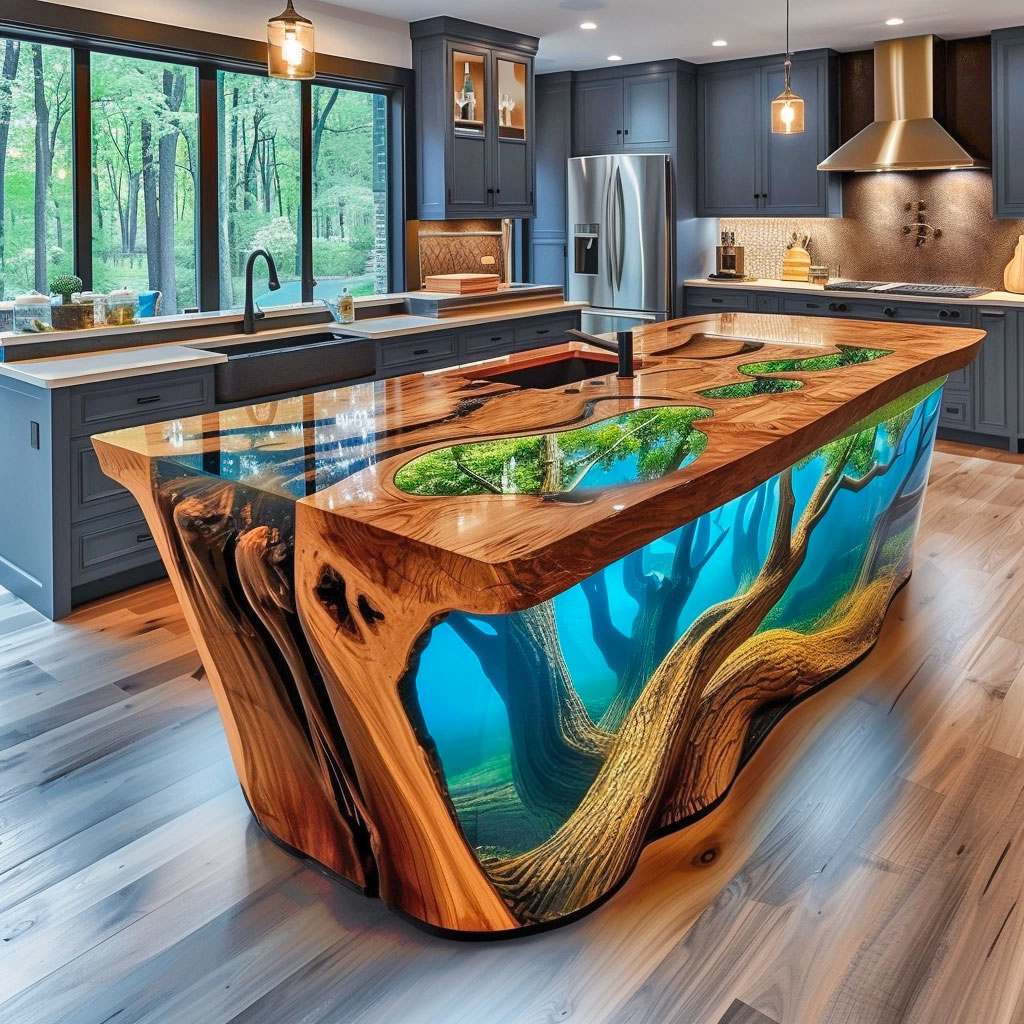
Unique Kitchen Island Ideas with Wood and Epoxy
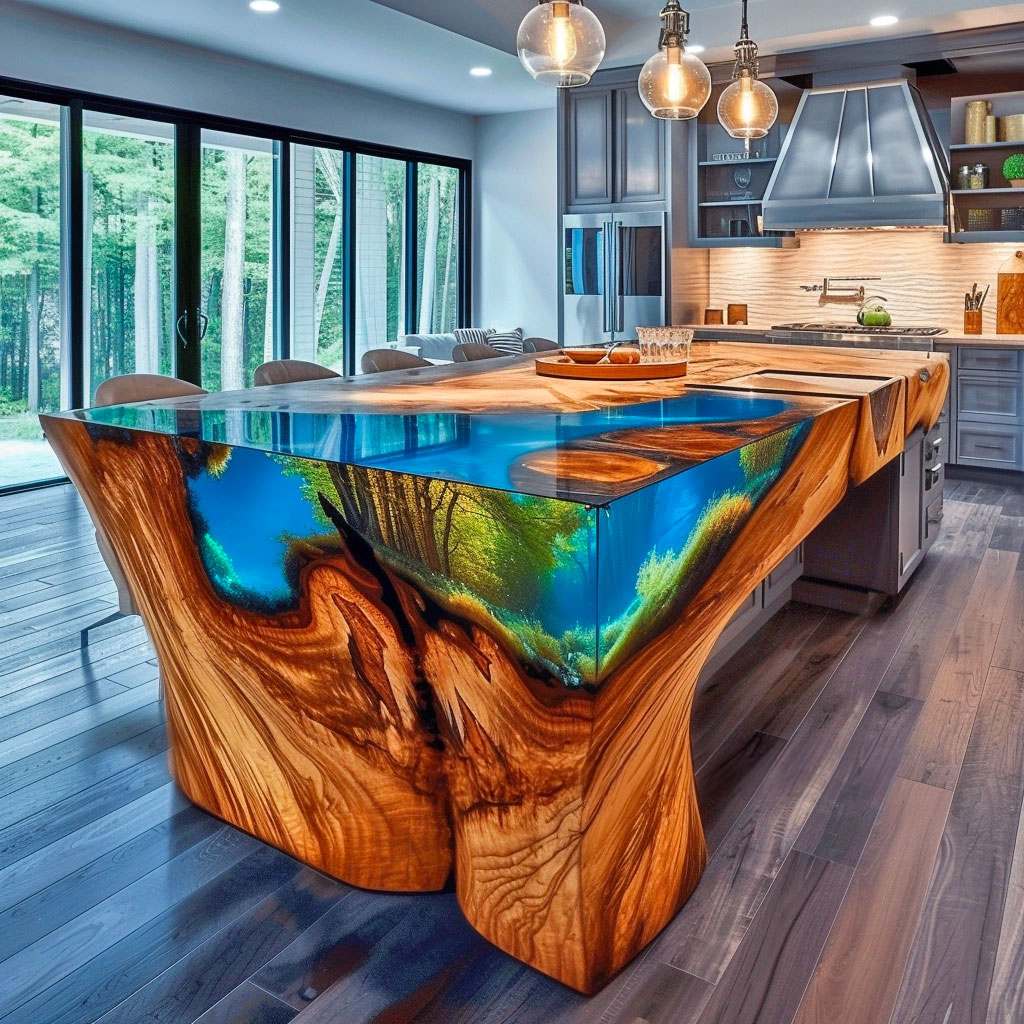
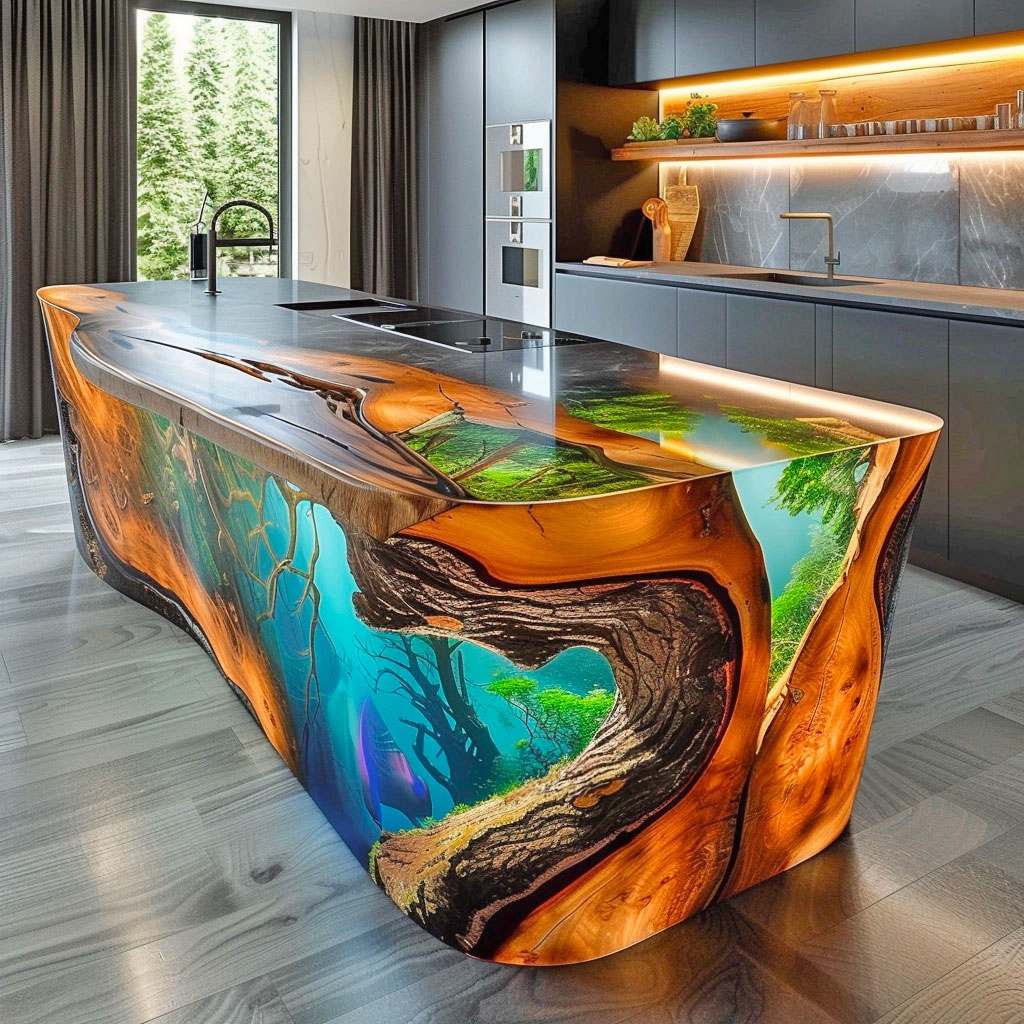
Stunning Patterns
Create unique patterns on kitchen islands by combining different wood species with epoxy. The blend of wood and epoxy results in a stunning visual effect, making the kitchen island a focal point.
Mixing various types of wood can produce intricate designs that are visually striking. For instance, combining dark walnut with light oak can create a beautiful contrast that enhances the overall aesthetic of the kitchen island.
- Wood species variety
- Intricate and stunning designs
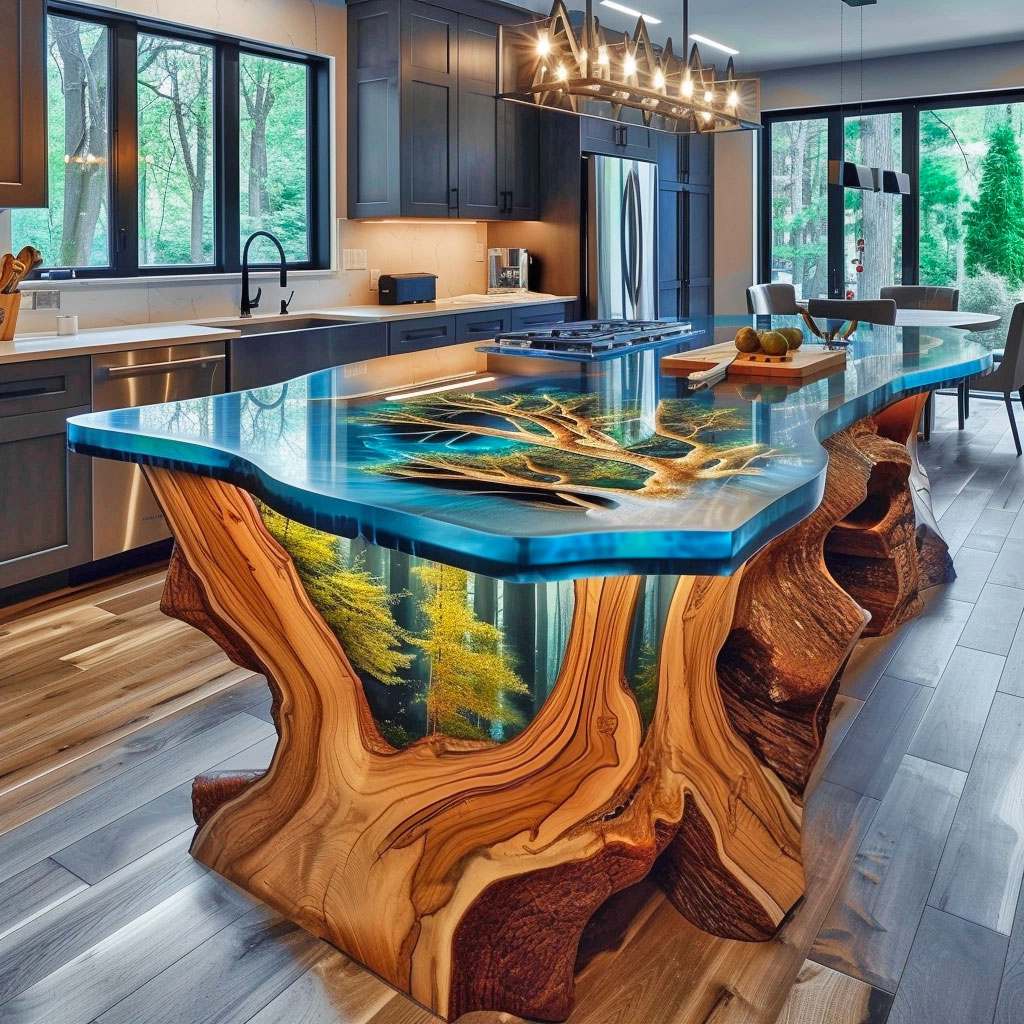
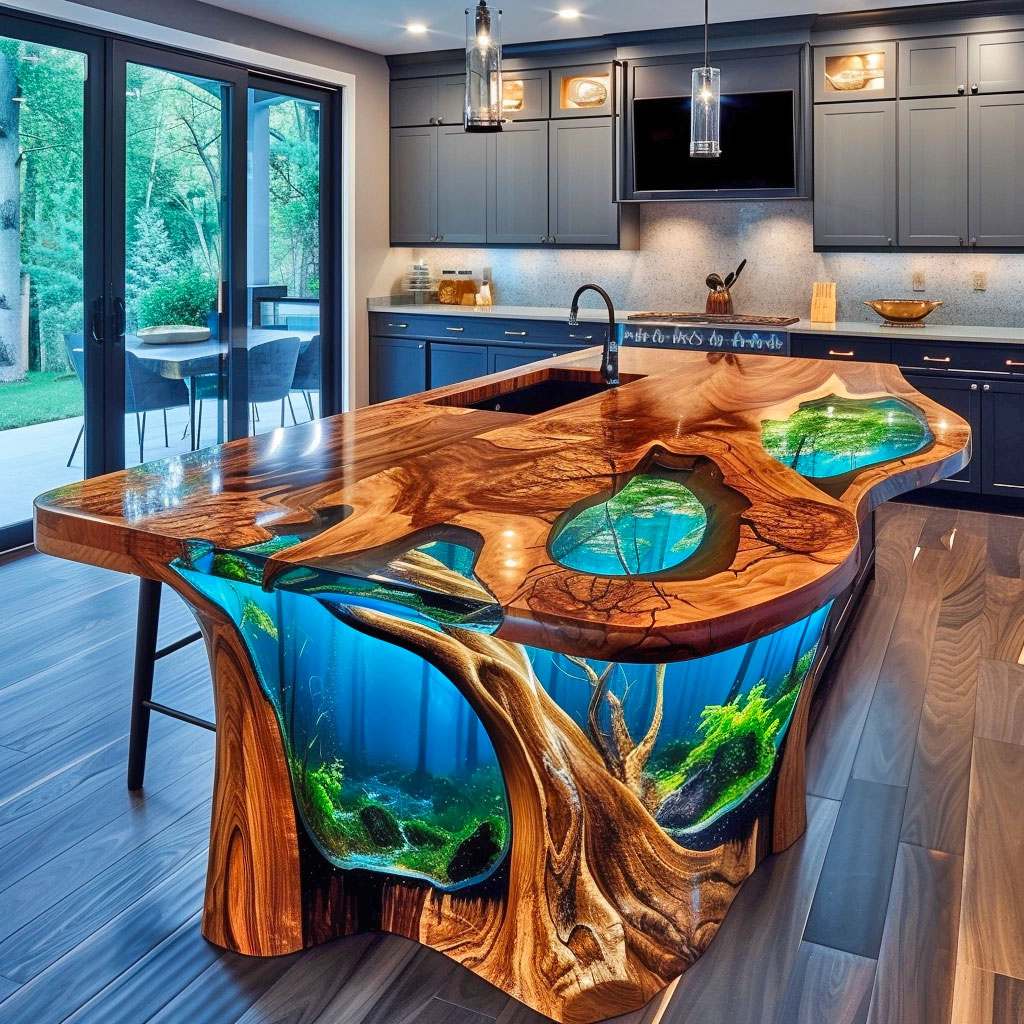
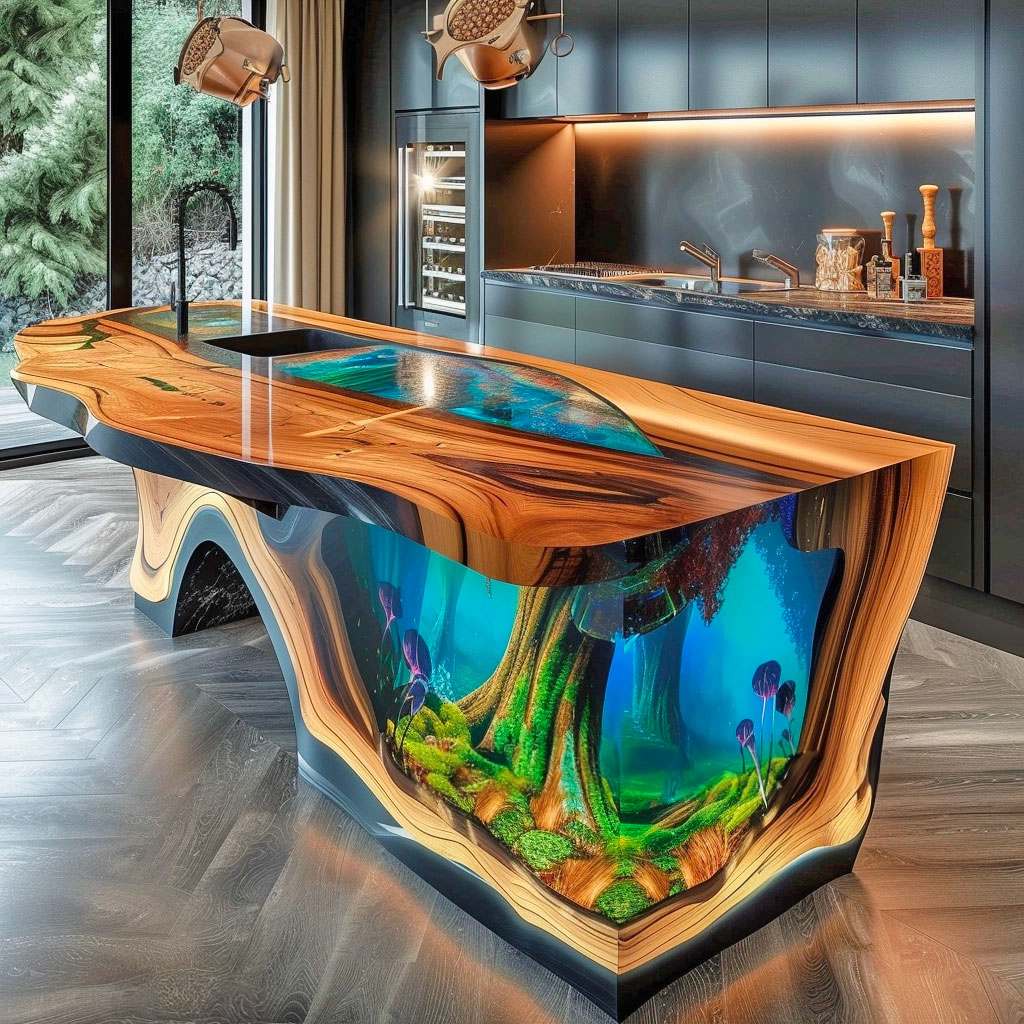
Natural Elements Integration
Incorporating natural elements like shells or stones into the epoxy adds a touch of nature to your kitchen island. By embedding these elements within the epoxy, you can achieve a one-of-a-kind design that reflects your personal style.
The integration of natural materials not only adds texture but also creates an organic feel within the space. Imagine small seashells embedded in clear epoxy, giving your kitchen island a unique and personalized look.
Design Planning for Wood and Epoxy Kitchen Islands
Size and Layout
When creating wood and epoxy kitchen islands, start by considering your kitchen’s size and layout. Ensure the island dimensions fit well within the space available. Think about how much room you need around the island for easy movement.
Begin by measuring your kitchen to determine how much space you can allocate to the island. Consider factors like clearance for opening cabinets, appliances, and walking paths around the island.
Wood Species Selection
Select a wood species that matches your kitchen decor and personal style preferences. For example, if your kitchen has a rustic theme, opt for reclaimed wood like barn wood or distressed oak. If you prefer a more modern look, consider using sleek maple or cherry wood.
Explore various options such as walnut, teak, or mahogany based on their durability and appearance when combined with epoxy resin. Different woods absorb epoxy differently, affecting the final look of your kitchen island.
Essential Materials and Tools for Wood and Epoxy Islands
Woodworking Tools
To craft wood and epoxy kitchen islands, you need tools like saws, sanders, and clamps. These are crucial for shaping the wooden parts of the island. For instance, a saw helps cut the wood to the desired size.
Wood is one of the primary materials used in creating these islands. It’s essential to have woodworking tools handy during construction. Sanders help smoothen rough edges on the wood pieces before assembly.
- Saw
- Sander
- Clamps
Epoxy Resin Supplies
Creating an epoxy surface requires resin, hardener, pigments, and mixing containers. The resin provides that glossy finish on top of the wood. Pigments add color variations to suit your design preferences.
When working with epoxy, it’s vital to ensure safety by using gloves, goggles, and a respirator to protect yourself from harmful fumes or skin irritation.
Step-by-Step Guide to Creating Wood and Epoxy Kitchen Islands
Constructing the Frame
To start creating wood and epoxy kitchen islands, first, prepare the wood by cutting it to size using a saw. Sand the surfaces until they are smooth to ensure a flawless finish. Next, assemble the wooden frame of the island using appropriate joinery techniques like pocket holes or mortise and tenon joints for stability.
Building a sturdy frame is crucial as it will provide support for the epoxy resin top. Ensure all pieces fit together snugly before moving on to applying epoxy resin. The wooden frame serves as the foundation for pouring and shaping the resin, so precision in construction is key.
Pouring Epoxy Resin
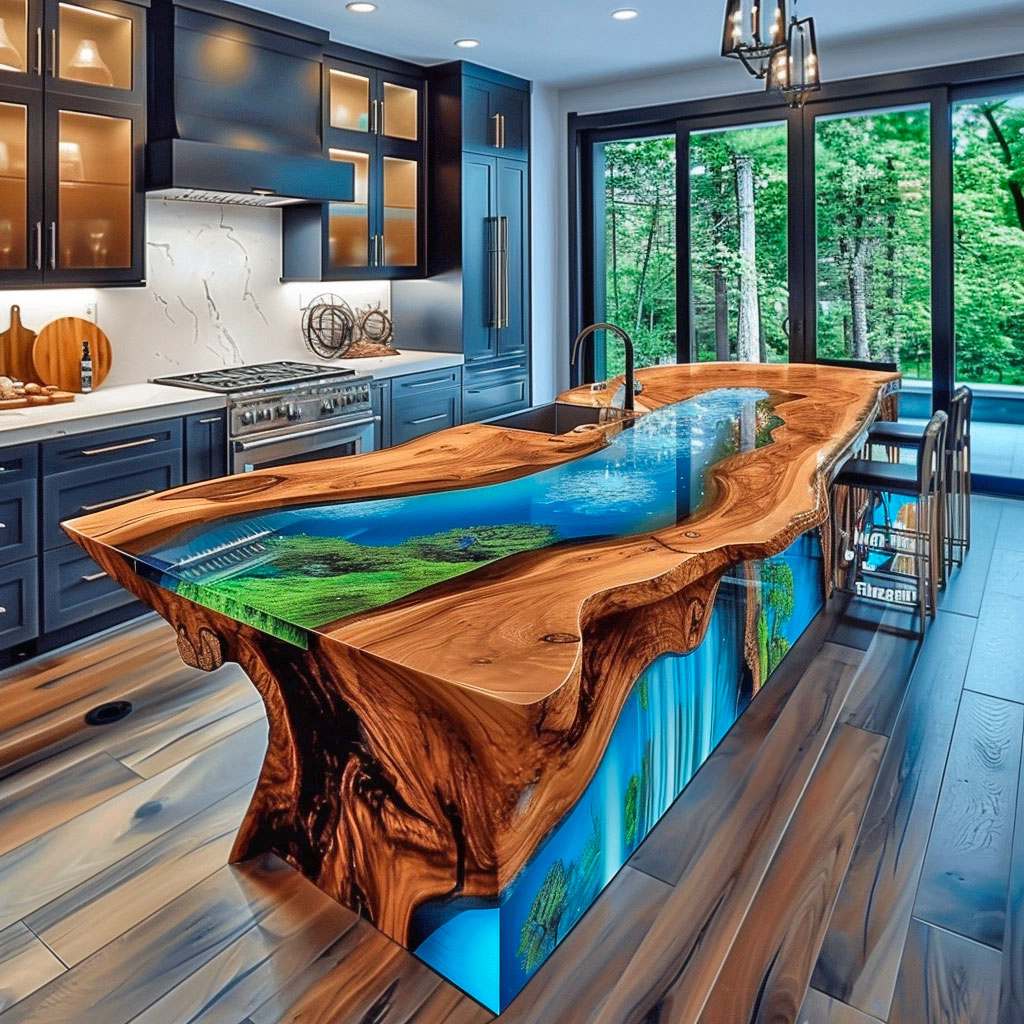
Once your wooden frame is ready, mix epoxy resin following the manufacturer’s instructions meticulously to achieve optimal results. Carefully pour and spread out the mixed resin onto your prepared wood surface evenly. Use a heat gun or torch to remove any air bubbles trapped in the resin during pouring.
Allow ample time for curing according to package directions before sanding down any rough edges or drips that may have formed during application. The cured epoxy will create a durable, glossy finish on your kitchen island that showcases both modern style and natural beauty.
Upgrade your kitchen with our Wood and Epoxy Kitchen 🌳✨ collection. Enhance your cooking space with the perfect blend of natural wood aesthetics and modern epoxy finishes. Click the icon below to explore our stylish and functional kitchen designs!
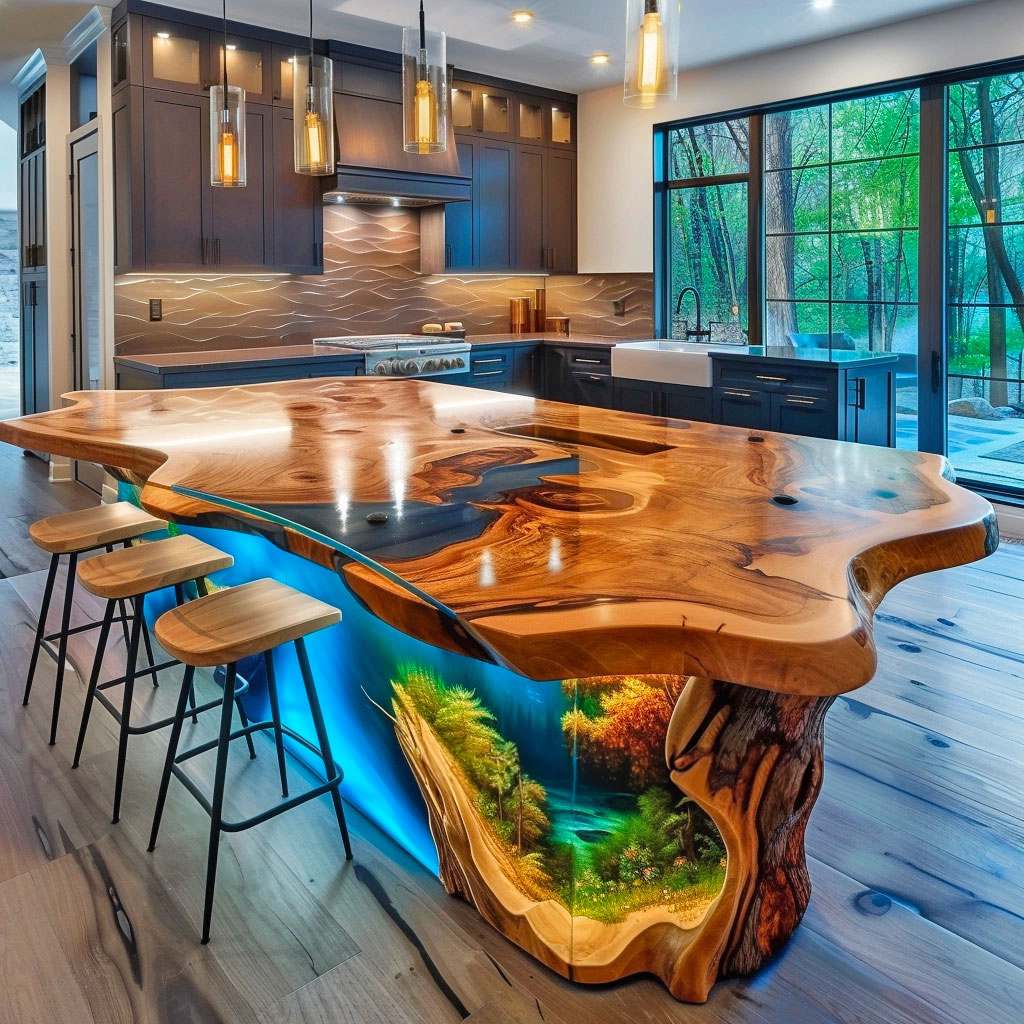
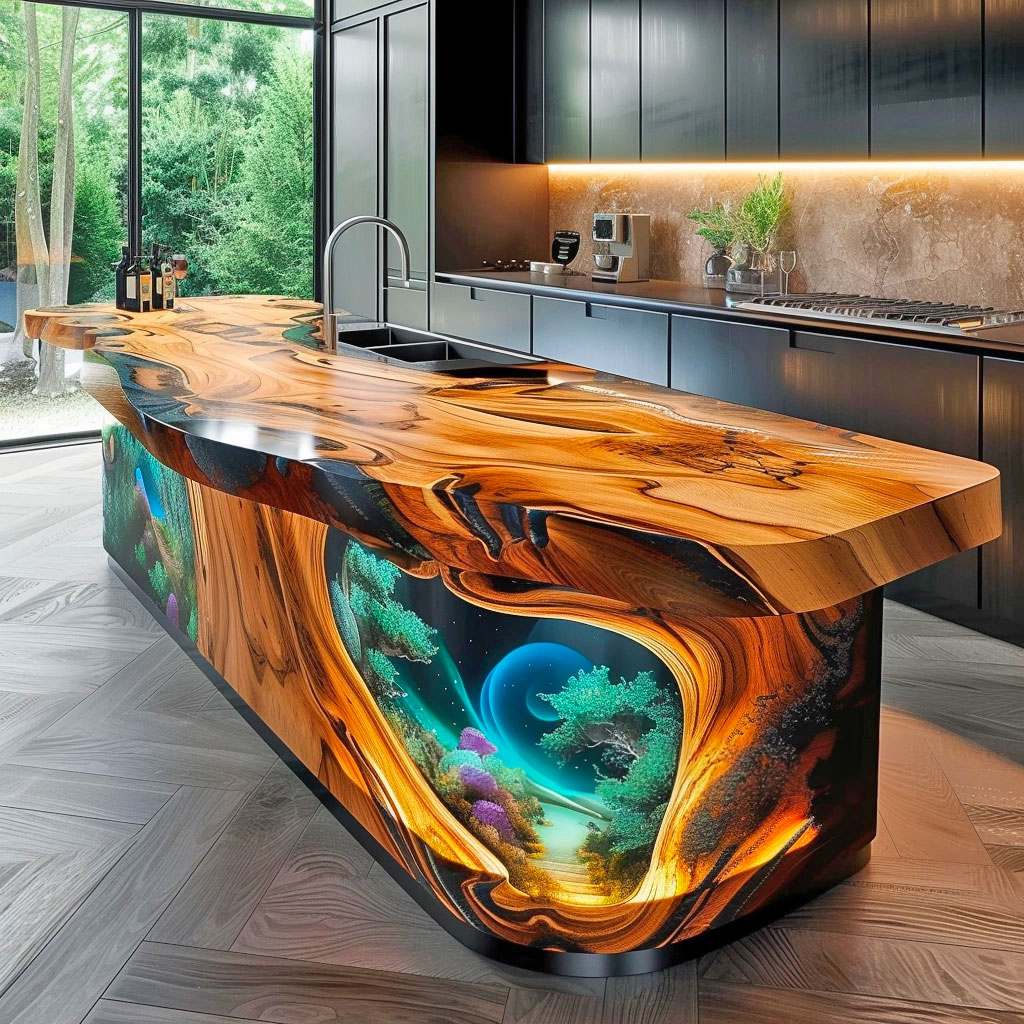
Artwork Creation Using Epoxy for Kitchen Islands
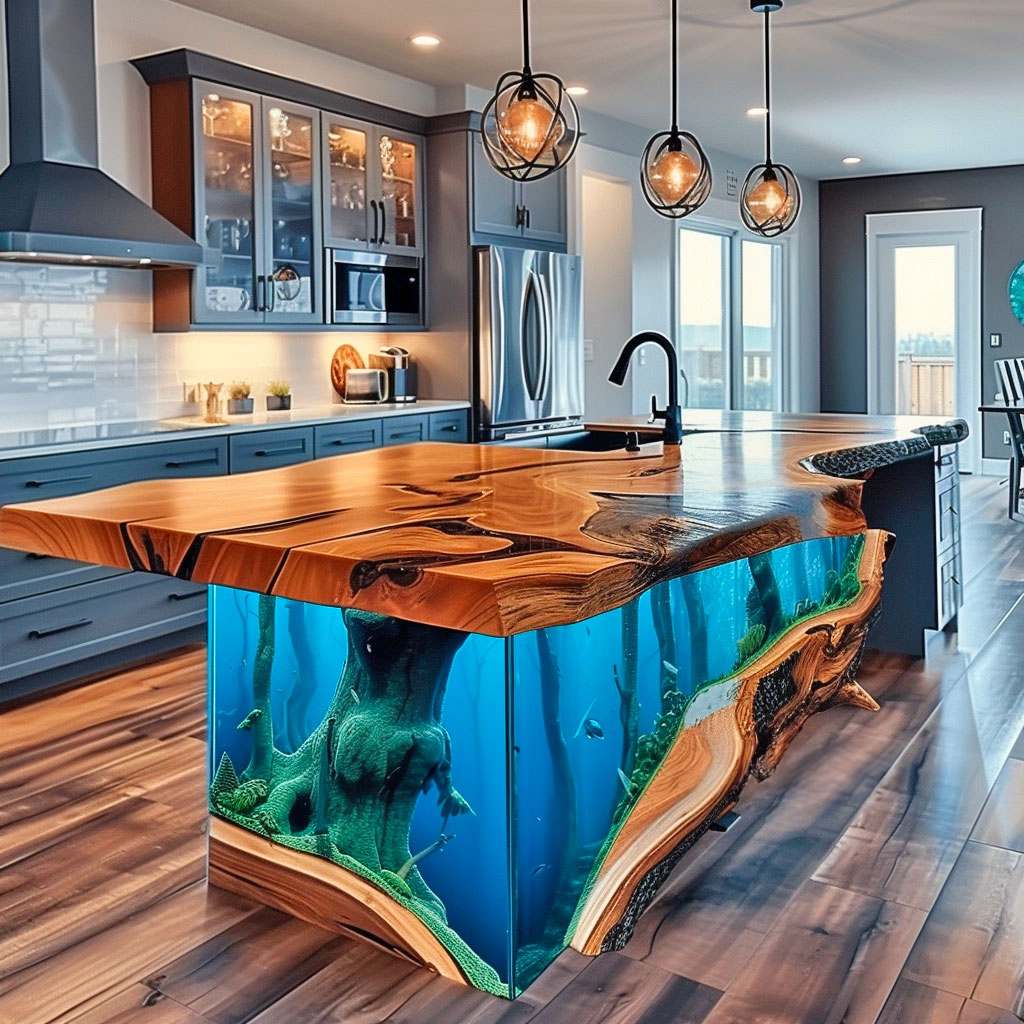
Intricate Designs
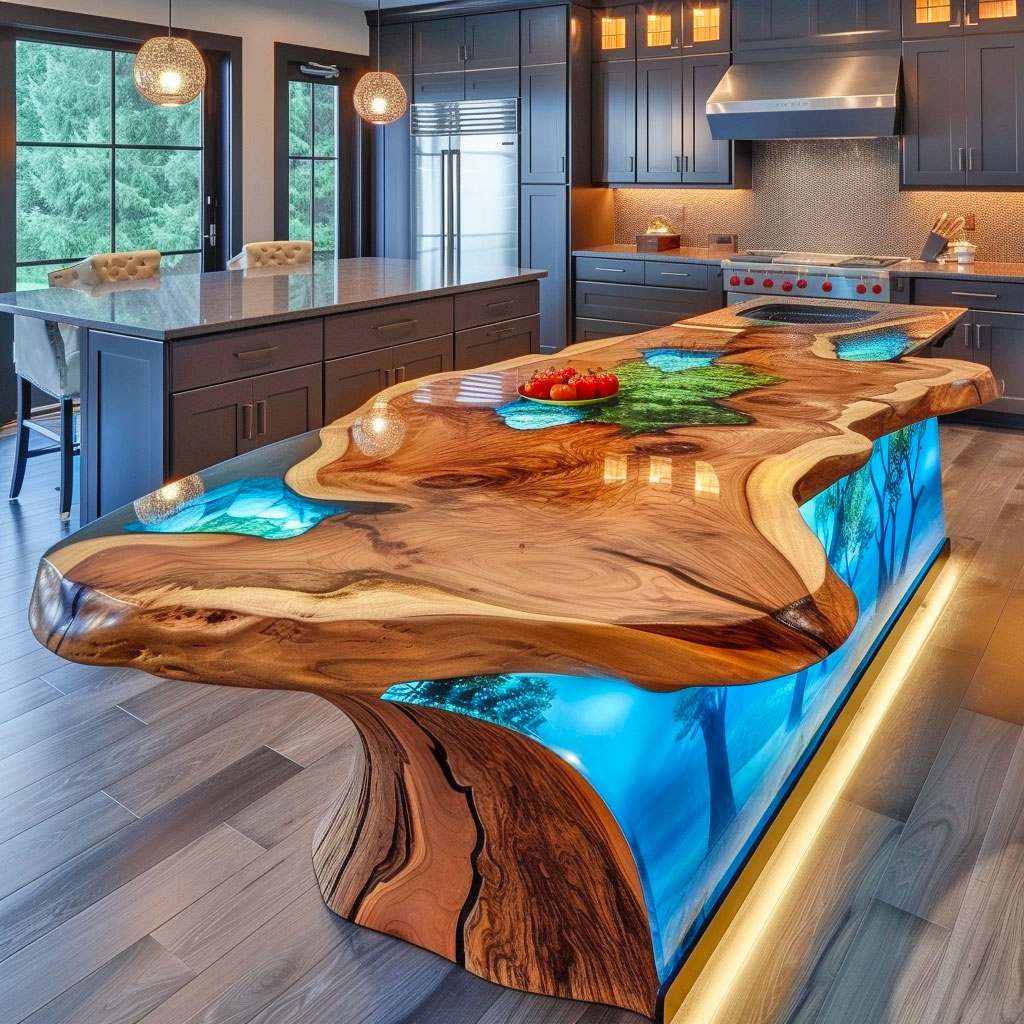
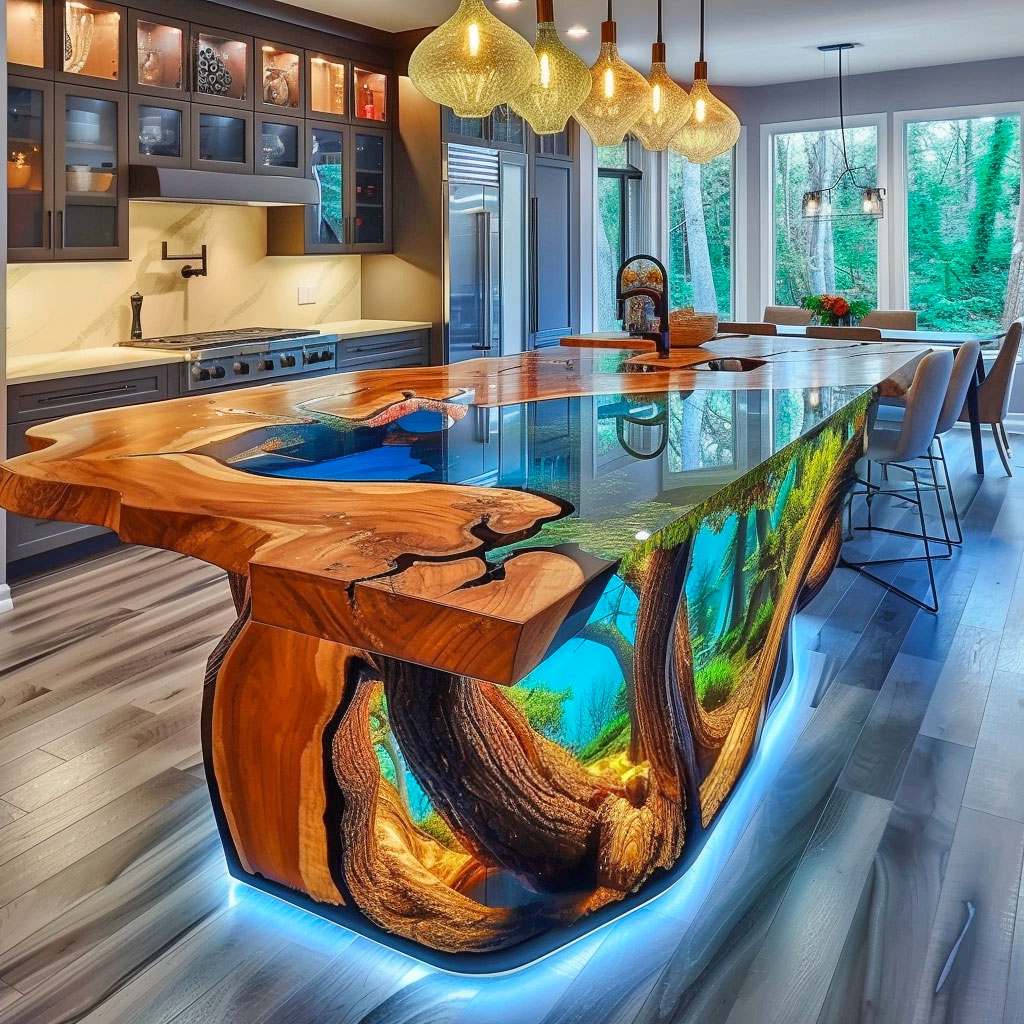
Enhance wood and epoxy kitchen islands by using various colors of epoxy to craft detailed patterns. Try creating floral motifs, geometric shapes, or even ocean-inspired designs. The possibilities are endless when combining different hues of epoxy to form intricate artwork on the surface.
Experiment with swirling techniques to achieve mesmerizing effects on the kitchen island. By blending colors strategically, you can create a visually stunning piece that becomes the focal point of your space.
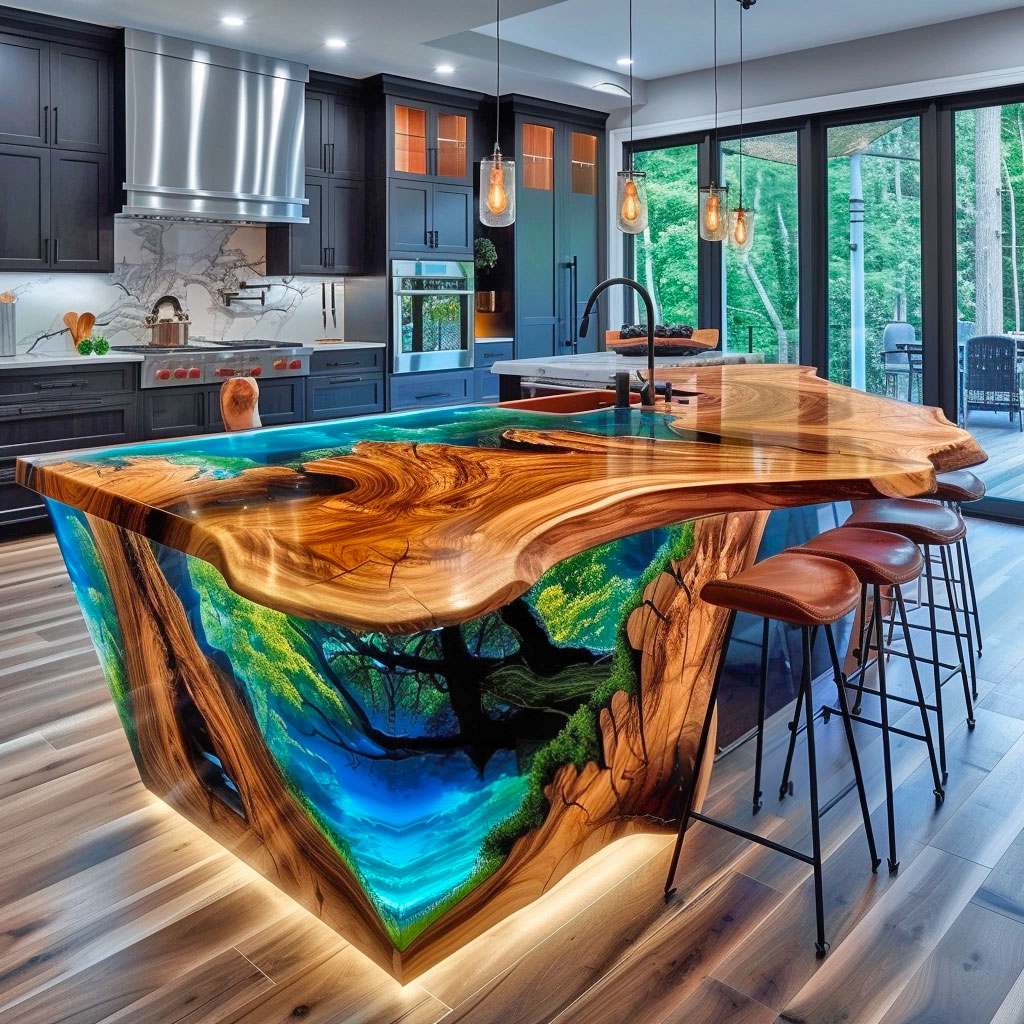
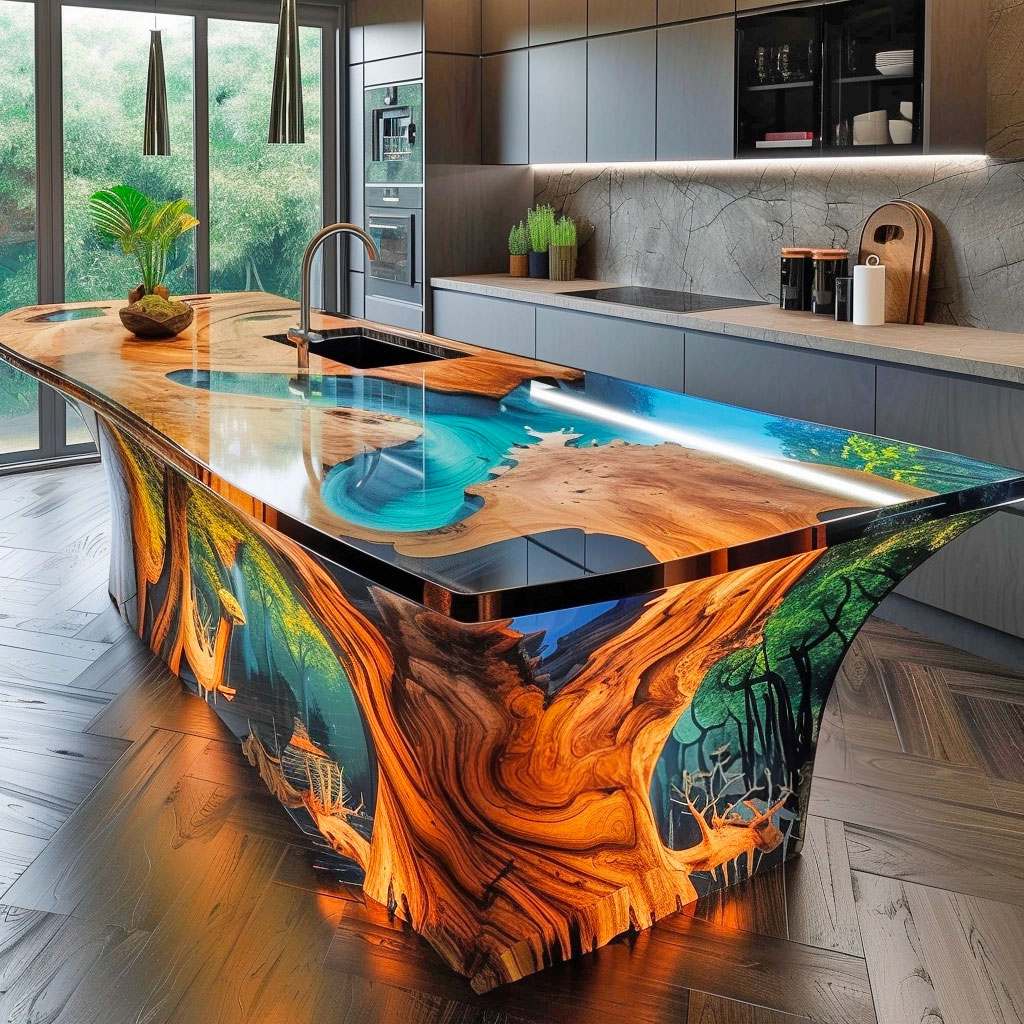
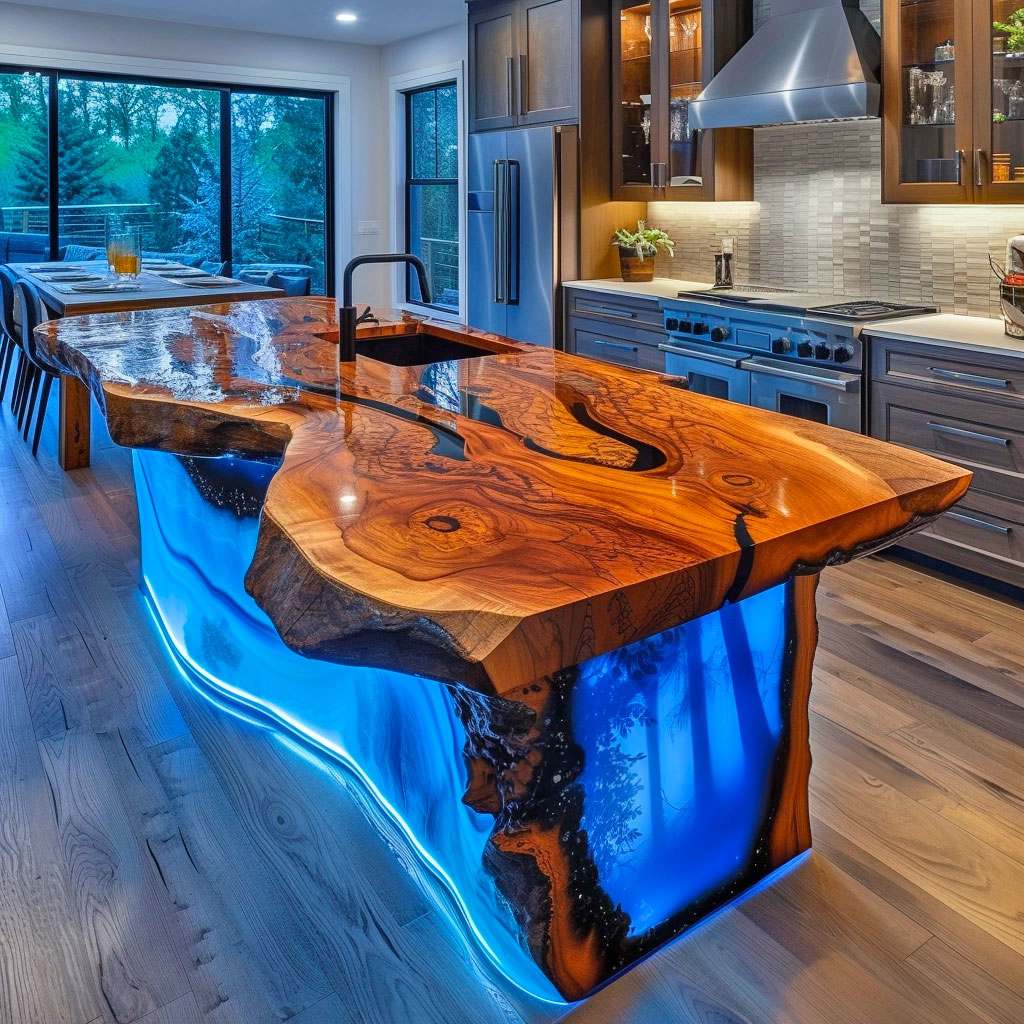
Metallic Pigments
Incorporate metallic pigments into the epoxy mixture to add a touch of elegance and luxury to your art piece. These pigments reflect light beautifully, giving your kitchen island a shimmering effect that catches the eye and adds depth to the overall design.
Mixing metallic shades like gold, silver, or bronze with colored epoxy can elevate the look of your kitchen island and bring a sense of opulence to the room. The interplay between light and these metallic accents creates a captivating visual display that enhances the beauty of your kitchen island artistry.
Read more: This Gorgeous Flooring is Crafted Using Sand and Epoxy
Sanding and Finishing Techniques for Epoxy Kitchen Islands
Coarse Sandpaper for Imperfections
Start by using coarse sandpaper to eliminate any flaws or bumps on the epoxy surface. This rough paper will help you level out any uneven areas, creating a smooth base.
Using coarser grits like 60 or 80 will efficiently remove imperfections, preparing the surface for further refinement. Once the initial sanding is complete, progress to finer grits.
Fine Grits for Polished Finish
Transition to finer grits such as 120, 220, and even up to 400 to achieve a polished and glossy finish on your epoxy kitchen island. Each finer grit will progressively smoothen the surface.
By incrementally moving from coarse to fine sandpaper, you’ll gradually refine the epoxy surface texture until it’s perfectly smooth. This process ensures a professional-looking result that enhances the overall aesthetic of your kitchen island.
Clear Coat or Wax Protection
After sanding down and achieving a flawless finish on your epoxy kitchen island, it’s essential to protect it with either a clear coat or wax. These protective layers not only safeguard the surface but also enhance its shine and durability over time.
- Pros:
- Achieves a smooth and polished finish.
- Enhances the aesthetic appeal of the kitchen island.
Read more: Live Edge Wooden Barn Doors Enhanced with Epoxy Resin – A Stunning Design Trend Worth Exploring!
Safety Measures When Working with Epoxy
Ventilation and Respirator
When working with epoxy, ensure you are in a well-ventilated area to avoid inhaling harmful fumes. If ventilation is inadequate, use a respirator to protect your lungs from the epoxy’s noxious vapors.
Epoxy fumes can be hazardous when inhaled, leading to dizziness or respiratory issues. It is crucial to prioritize safety by either working in a properly ventilated space or wearing a respirator for protection against these harmful substances.
Protective Gear and Handling Instructions
To prevent skin contact and eye injuries, always wear protective gloves and goggles when handling epoxy materials. These safety measures are essential as direct contact with epoxy can cause skin irritation or burns if not handled properly.
It is vital to follow the manufacturer’s instructions meticulously for the correct handling, mixing, and disposal of epoxy materials. Adhering strictly to these guidelines ensures your safety while working on projects involving wood and epoxy kitchen islands.

You’ve now uncovered the vast possibilities of incorporating wood and epoxy in your kitchen island design. From understanding the benefits to exploring unique ideas, planning, essential materials, step-by-step guides, artwork creation, finishing techniques, and safety measures, you’re equipped with a wealth of knowledge to embark on your creative journey. Remember, safety first! Now it’s your turn to bring your vision to life, infusing your kitchen with personality and style through the artistry of wood and epoxy. Get ready to amaze yourself and others with your stunning creations!